Hey there, fellow science educators! Do you get your students to examine cells under a microscope or use a cells graphic organizer? This post is all about getting the tricky stuff to stick, like the names and functions of the cell organelles. Whether you’re introducing your students to cells for the first time or diving deeper into the concept, interactive notebooks can really change the game. They keep students engaged, make the content hands-on, and help those tricky terms stick. You may not be totally invested in interactive notebooks but cell structure is one topic that really works well with them.
Cells, Tissues, Organs, and Systems
We all know the basic structure: cells make up tissues, tissues form organs, and organs work together in systems. But getting students to really understand how all these levels of organization connect can be a bit of a challenge, right?
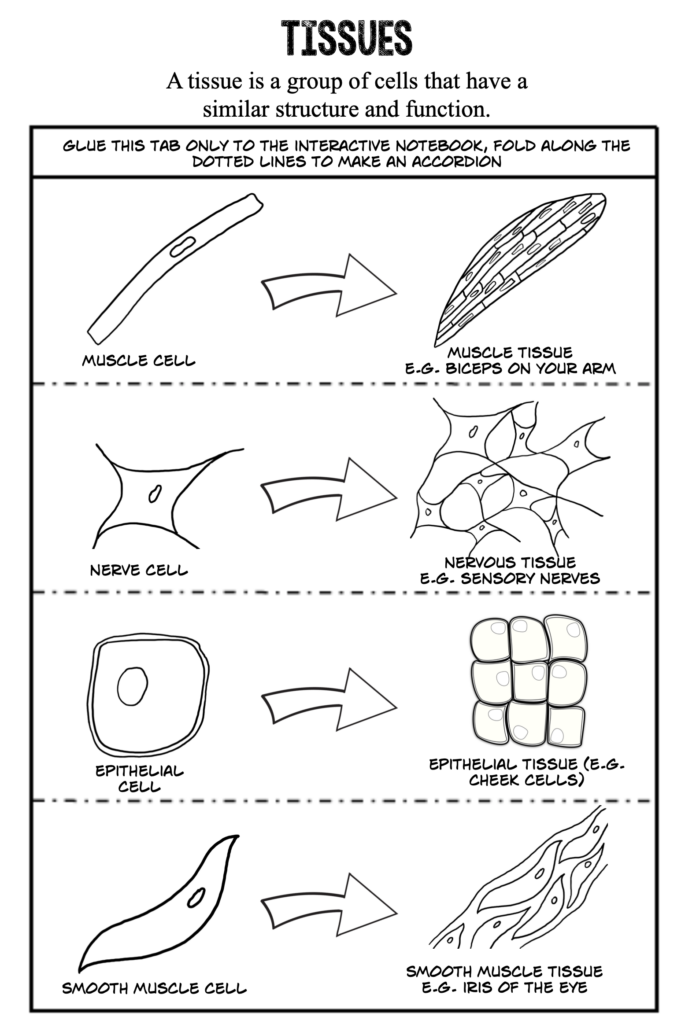
Here’s where the interactive notebook shines. Instead of just having them memorize facts, why not make it a hands-on activity? Have students fold and label sections in their notebooks for each level: one tab for cells, another for tissues, and so on. They can draw or paste pictures, jot down definitions, or even use real-life examples (e.g., a muscle cell leading to bicep muscle). It’s a perfect visual tool for reinforcing those tricky concepts!
And the best part? They own the learning. By building their notebooks piece by piece, they’ll understand the relationship between cells, tissues, organs, and systems in a much deeper way. Plus, they get to see their work grow right in front of them. Interactive notebooks force the students to slow down and process information, that’s the key.
Cell Diagrams: Let Them Be the Artist
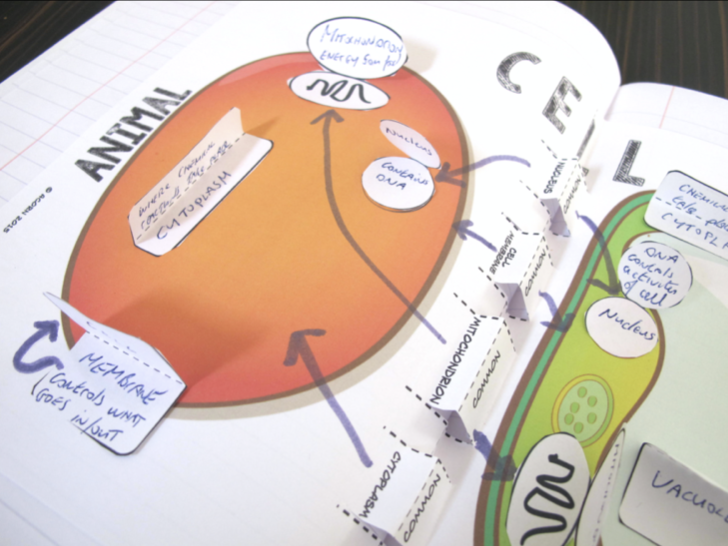
Teaching cell structure? Interactive notebooks give your students the freedom to create cell diagrams that go beyond just copying from a textbook. You can have them draw or cut out parts of the cell—like the nucleus, cell membrane, or mitochondria—and write in their own words what each part does. You can make a 3D animal cell model (here’s the blog post link to that) or make a pop-up foldable of the cell parts like this.
What I love about this is that they get to personalize their learning. One of my favorite activities is having students create a pop-up cell. Yep, it’s as fun as it sounds! They cut out and fold the organelles, so they “pop” off the page. It turns their notebooks into a mini 3D project. And honestly? You’ll never see students this excited about a nucleus again!
Cells Under a Microscope: Bringing Science to Life
If there’s one way to wow your students, it’s by showing them cells under a microscope. It’s one thing to talk about cells, but it’s a whole different ball game when they can see them with their own eyes. Whether you have them look at plant cells (with those crisp, defined walls) or animal cells (which tend to look like little blobs), it’s like the material comes alive. I love it because it shows the cells as they are, not idealized versions that they see in the books.
Make sure to incorporate this into your interactive notebook lesson! Have students draw what they see under the microscope right into their notebooks. It’s even better if you can show them both plant and animal cells so they can compare the two. They can draw one on the left page and the other on the right—highlighting the differences like the presence of a cell wall in plants or the lack of chloroplasts in animal cells. This kind of visual, side-by-side comparison really helps things click for them.
And if microscopes aren’t always available? No problem! You can use online images or videos, and students can still document what they learn in their notebooks.
Cells Graphic Organizer: Simplifying the Complex
Ah, the cells graphic organizer. This little tool is a life-saver when it comes to simplifying all the parts and processes that go along with cells. When your students are learning about the different organelles, functions, and types of cells, an organizer can help them see the bigger picture.
One thing I love to do is create a foldable where each flap represents an organelle. When students lift the flap, they write down what it does and why it’s important. It’s super visual and interactive—plus, it helps keep everything organized. You can also have them compare plant and animal cells using a T-chart in their notebook, so they can easily see the differences.
Honestly, the graphic organizers work great not only for cells but also when you get into tissues, organs, and systems. It helps tie everything together, so by the time you’re done, your students have a clear, organized view of the whole picture.
I can’t say enough good things about using interactive notebooks when teaching cells. It transforms a potentially dry subject into something exciting and memorable. Your students will love the hands-on elements, from creating their own cells graphic organizer to drawing what they see under the microscope. Plus, the foldables and pop-ups make learning feel like a craft project rather than just another science lesson.
So if you haven’t tried it yet, give it a shot. Trust me—your students will thank you for making the world of cells a whole lot more fun and engaging!


