Cell – Animal Model

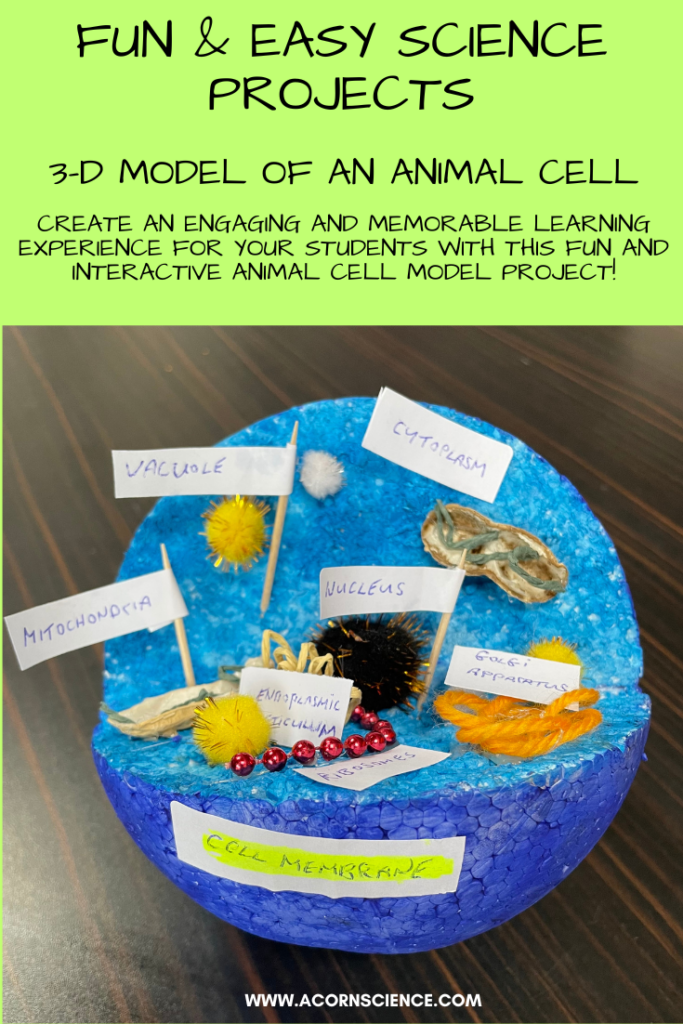
Making an animal cell model is a classic learning activity in the science classroom. Being able to see or, better yet, create touch and feel a model intensifies the understanding and ensures what I like to call the stickiness of the subject matter. Modeling the animal cell is an easy and fun activity and is a perfect project for a science fair.
There are many ideas for creating an animal cell model, and you’re probably familiar with the jello model. Don’t get me wrong, I like it, but it’s messy. Also, the animal cell parts are sometimes obscured by the jello.
This model of the animal cell is the one I like. It’s robust and colorful, and you can add as many parts as you want for the class. Built-in differentiation!

Materials
All you need for the main structure of the cell is a styrofoam sphere, which you can easily cut. The organelles are made from whatever you have handy, like pipe cleaners, thread, buttons, or even candy. Modeling clay is another simple option that allows kids to craft the organelles to their liking. Get the kids to bring these in.
For the organelles, you can use whatever you have at hand: pipe cleaners, thread, buttons etc. I’ve found that empty peanut shells with green thread tucked inside them make lovely mitochondria.
Peanut Shell to Mitochondria
Modeling clay is super easy to use, and the kids can craft the organelles to their liking. It’s cheap, and (most of them) won’t eat it.
Speaking of eating, you could always use candy. Candy comes in all shapes and colors, and the kids can bring it in too.
Sticky labels and cocktail sticks are required to label each part of the cell. Depending on the age of the kids, you may need to supervise them while they’re cutting the styrofoam.
Creating the Model
Creating the model is easy. The kids decide what color to paint the outside and inside of their animal cell model. I chose shades of blue as methylene blue is used to stain animal cells. Acrylic paints do the job nicely and dry reasonably fast (you can use a hair dryer to speed things up). The animal cell model may need a few coats.
First, cut out a quarter of the sphere where they’ll add their organelles and label them. A serrated knife works best for this. They will need to paint this before adding their cell organelles. Using a lighter shade than outside works well, but hey, let loose! The inside of the animal cell model will have a lovely granular texture from the styrofoam beads. The painting/drying takes most of the time. You can get the kids to do this at home if you’re stuck for time. You can cut the styrofoam ball in half and add the animal cell organelles. It’s helpful to have some spare in case a student forgets to bring it in.
More organelles in the animal cell model
Display a labeled cell with the organelles on the whiteboard so they can refer to it for the shape and spelling of each organelle. Finally, they need to label each organelle as they go. This is easier than leaving it until the end. Create an engaging and memorable learning experience for your students with this fun and interactive animal cell model project!
Would you like to get the full instructions for this and four other easy science projects for science fair? You can download my 25 page pdf for free at this link.
